5 * 2[1] 10In this book, we’ll be using R and the RStudio IDE. You’ll need to download each of these separately from the Internet to use on your local workstation.
What is R?
R is the name of the programming language itself, based off of S from Bell Labs, which users access through a command-line interpreter (>). Here is a bit of R code:
5 * 2[1] 10If you want to learn more about the history of R as a programming language, we recommend reading the original paper by Ihaka. One of our favorite quotes from
“We have named our language R—in part to acknowledge the influence of S and in part to celebrate our own efforts. Despite what has been a nearly all-consuming effort, we have managed to remain on the best of terms and retain our interest in computers and computing”
— Ihaka and Gentleman (1996)
What is the RStudio IDE?
The RStudio IDE is a powerful and convenient user interface that allows you to access the R programming language along with a lot of other bells and whistles that enhance functionality (and sanity). The acronym IDE stands for “integrated development environment” which is, to put it technically, where you do stuff. It is where you will work with R.
You can use R with its built-in GUI (“graphical user interface”), but in this book, we’ll use and show you how to use the RStudio IDE instead.
R is currently developed by the R Development Core Team and, at the time of this writing, the latest R release is 4.3. R has a package system that allows users to write and distribute their own packages of functions. The number of user-created packages at this point is well over 10,000 and that figure is part of the reason why R has so much functionality.
There are two pieces of software you’ll need to download. One is R itself and the other is the RStudio IDE. Luckily, you can use both of these in Windows, macOS, and in various distributions of Linux. Depending on your OS there are preferred ways to install both. While we do need both pieces of software installed, the order of installation is not important.
Here are the steps for obtaining and installing the R programming language.
You then have R. If you’d like to be fully certain of that, open the Terminal application and type R and the R command-line console should appear.
Launch R. You should see one console with a command line interpreter (>). Close R.
To install the RStudio IDE on macOS:
Keeping the RStudio app in the macOS Dock is a good idea for easy access to the IDE.
Launch RStudio. You should get a window similar to the screenshot you see here, but yours will be empty. Look at the bottom left pane: this is the same console window you saw when you opened R in the previous session.
> and type x <- 2 + 2, hit enter or return, then type x, and hit enter/return again.[1] 4 prints to the screen, you have successfully installed R and RStudio, and you can move onto installing packages.The installation of R on Windows is not very different from that on the Mac. There are some subtle differences though. Let’s walk through the entire process. First, we need to get R, so here are the steps:
R will create a few shortcut icons and a good way to check that the installation had succeeded is to open R through the Start Menu.
Launch R. You should see one console with a command line interpreter (>). Close R.
The next step is to get RStudio IDE.
After installation, try opening RStudio; the IDE will appear on the screen. I suggest keeping the RStudio icon pinned to the Task Bar so that it’s easily accessible.
Launch RStudio. You should get a window similar to the screenshot you see here, but yours will be empty. Look at the bottom left pane: this is the same console window you saw when you opened R in the previous session.
> and type x <- 2 + 2, hit enter or return, then type x, and hit enter/return again.[1] 4 prints to the screen, you have successfully installed R and RStudio, and you can move onto installing packages.The RStudio IDE includes:
>),This is an integrated development environment (IDE) that makes it easy to do work with R (we’ll simply refer to this IDE as RStudio throughout this book). RStudio and R itself both need to be installed separately (but the order of installation does not matter).
RStudio has a customizable, four-pane workspace. It has a collection of useful features that help with R coding such as syntax highlighting, autocomplete, file and project management, and much more.
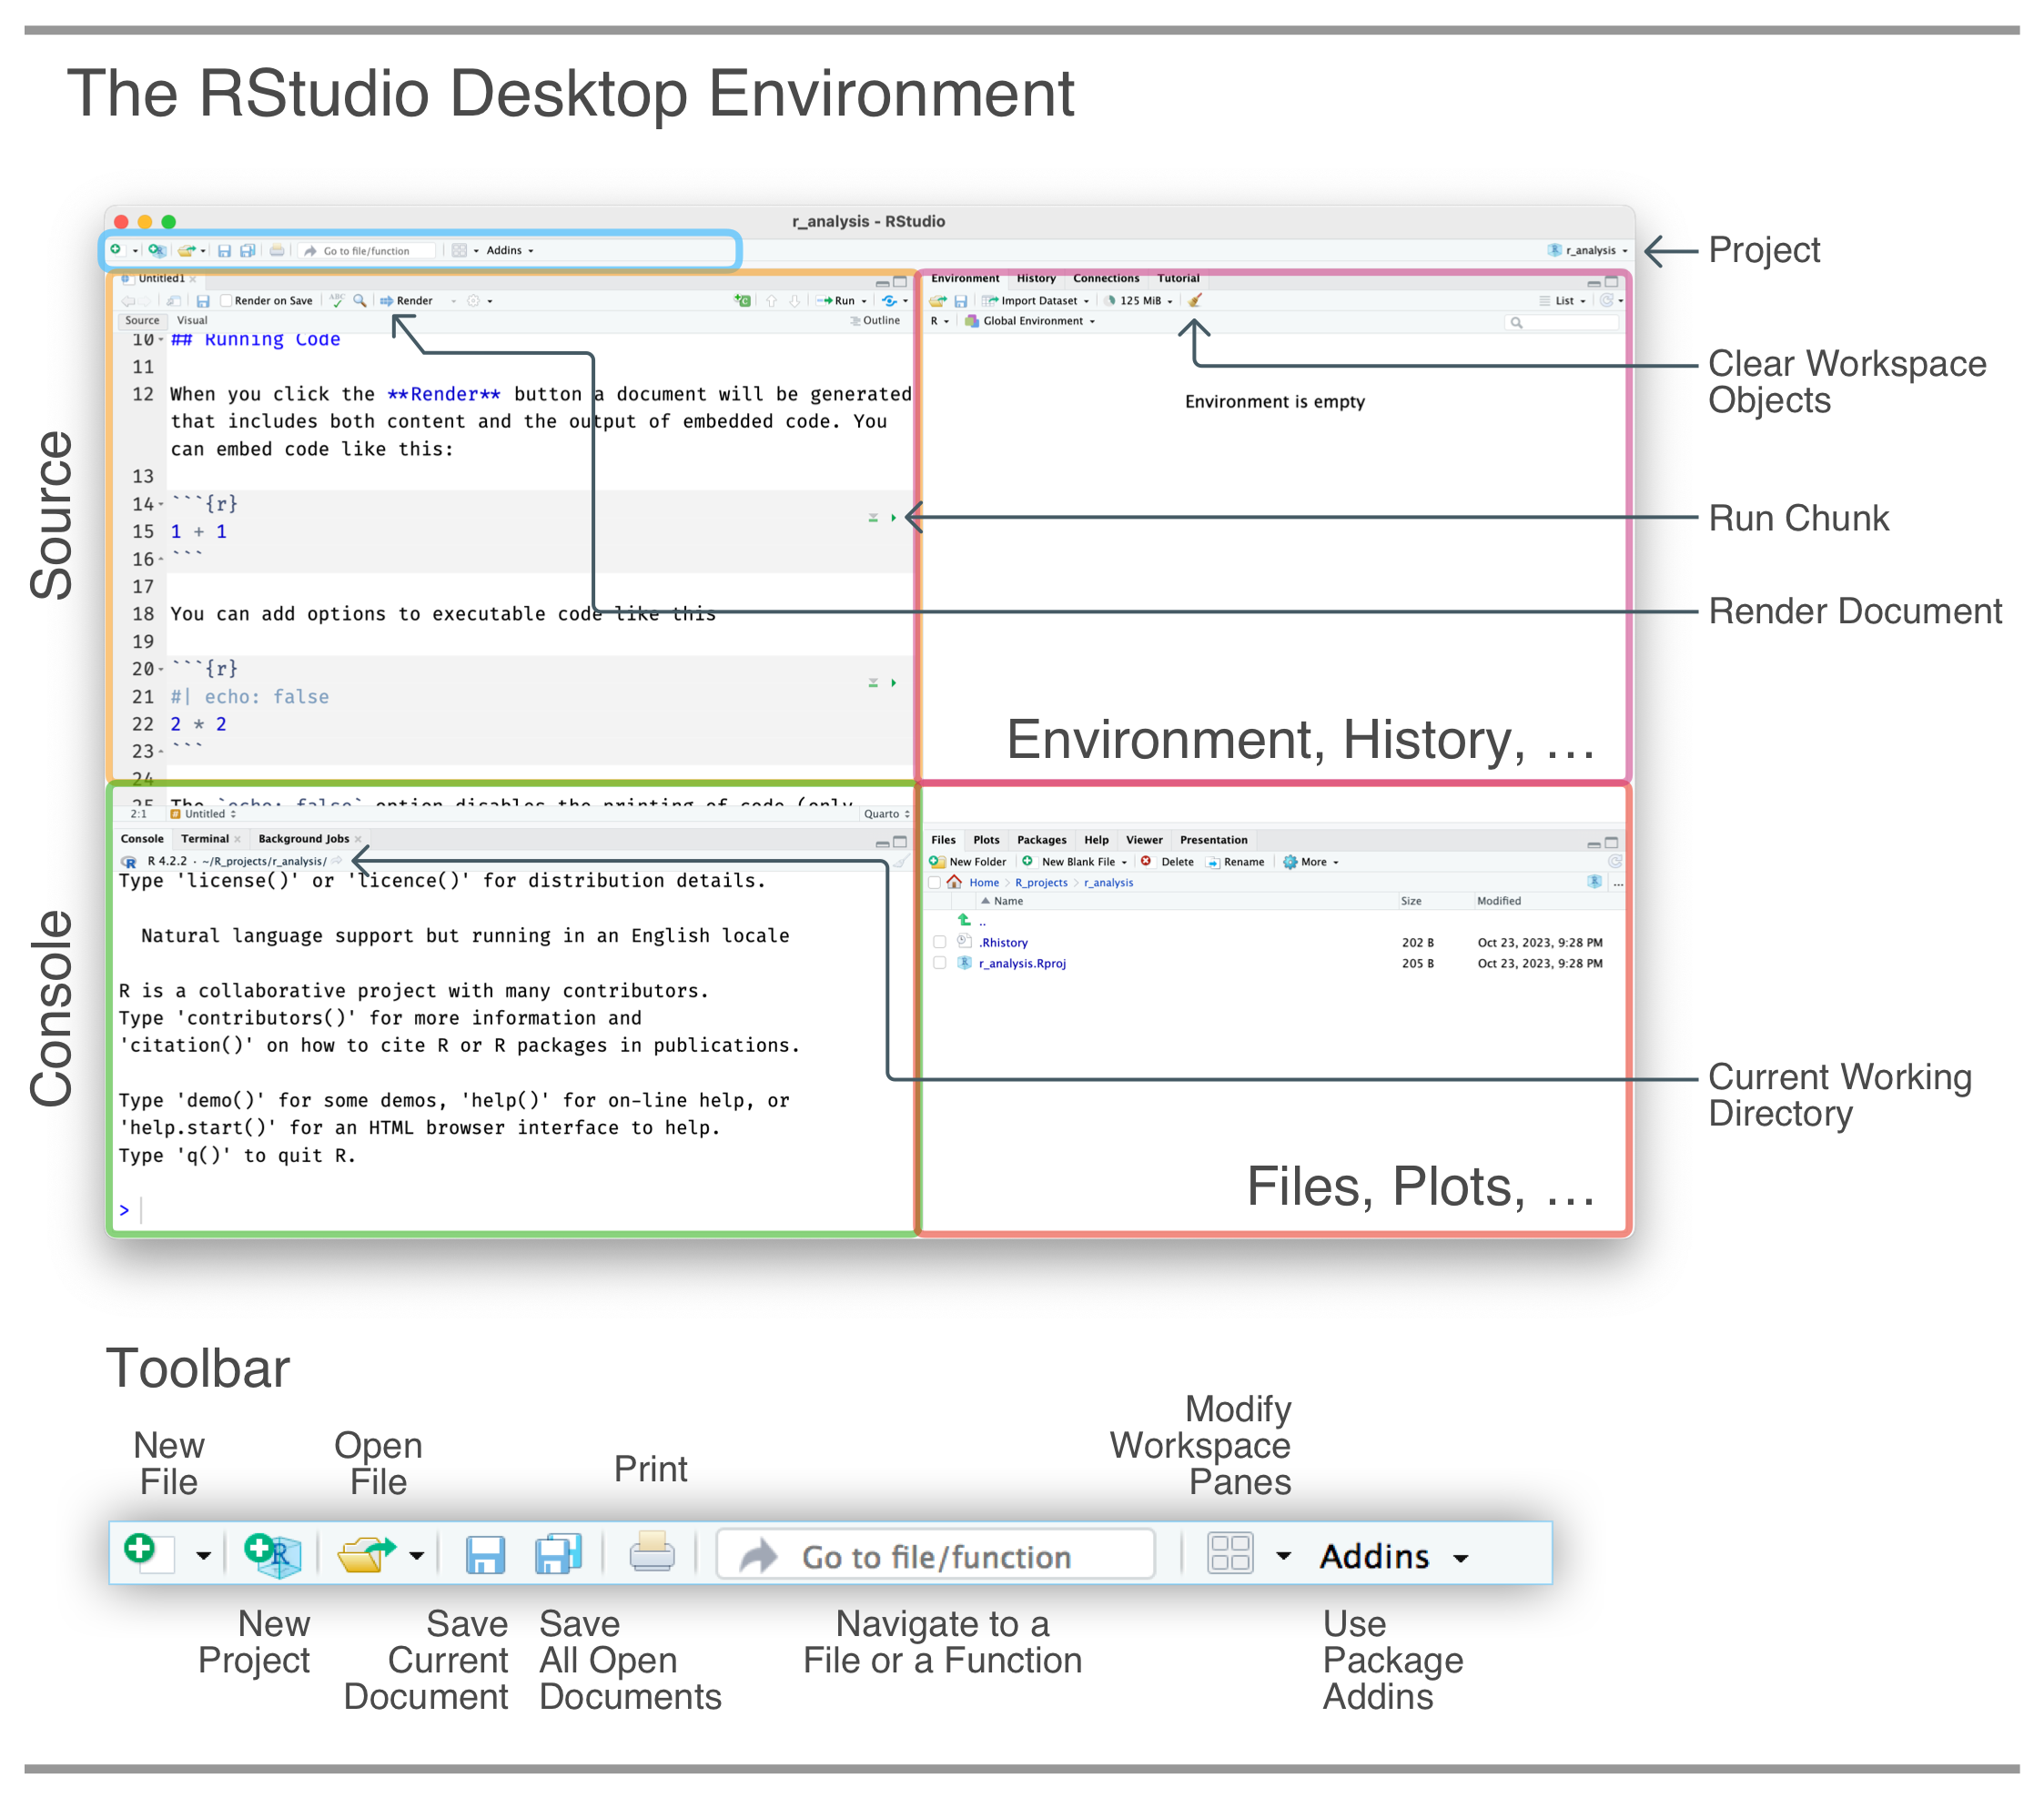
The diagram shown in above provides a reference to a cross section of the buttons available in the initial view. The most important takeaways from this first look at RStudio are:
It’s important to note that not all of the features of RStudio are likely to be touched by the average user. Early on, we will only need a very small subset of the functionality that’s provided.
Indeed, a little can go a long way, so, while on the topic of the small things, it’s never too early to learn about a few useful keyboard shortcuts. These are the ones that you’ll use again and again.
With time, it becomes easier to RStudio with less reliance on a pointing device. If you want to get on that road try the RStudio shortcut Shift + Option + K (Shift + Alt + K on Windows), it brings up the (Keyboard Shortcuts Help overlay (which has a lot of keyboard shortcuts).